
Tie-dye is an ancient textile art form that creates vibrant, unique patterns by folding and dyeing fabric. It symbolizes creativity and cultural heritage, offering endless design possibilities.
1.1 What is Tie-Dye?
Tie-dye is a resist-dyeing technique that involves folding, twisting, or pleating fabric to create unique, intricate patterns. By binding the fabric with string, rubber bands, or other materials, certain areas are protected from the dye, resulting in distinctive, colorful designs. This method allows for endless creativity, as the folding techniques and dye application vary widely. Tie-dye has deep cultural roots, with origins tracing back to ancient civilizations in Asia, Africa, and South America. It gained widespread popularity in the 1960s as a symbol of counterculture and self-expression. Today, tie-dye is enjoyed globally, offering a fun and artistic way to transform clothing and fabrics into personalized, one-of-a-kind pieces.
The process typically involves prewashing fabric, applying resistors like rubber bands, and then soaking the fabric in dye. After allowing the dye to set, the resistors are removed, revealing the hidden patterns. Tie-dye is not only a practical craft but also a way to embrace individuality and creativity. Its vibrant colors and unpredictable results make it a beloved activity for people of all ages and skill levels.
1.2 History and Cultural Significance of Tie-Dye
Tie-dye has a rich history dating back thousands of years, with roots in ancient civilizations in Asia, Africa, and South America. The technique was highly valued for its unique, handcrafted patterns, often reserved for ceremonial or royal attire. In Asia, particularly in India and Japan, tie-dye was used to create intricate designs for traditional garments. In Africa, it was a symbol of cultural identity and storytelling. The 1960s counterculture movement in the United States revived tie-dye, making it a symbol of freedom, creativity, and nonconformity. Today, tie-dye is celebrated globally for its artistic expression and accessibility, appearing in fashion, art, and educational settings. Its enduring appeal lies in its ability to connect people across cultures and generations, offering a timeless way to create personalized and meaningful designs.
From traditional rituals to modern fashion, tie-dye continues to inspire creativity and self-expression, making it a cherished craft with deep historical and cultural significance.
Materials and Supplies Needed
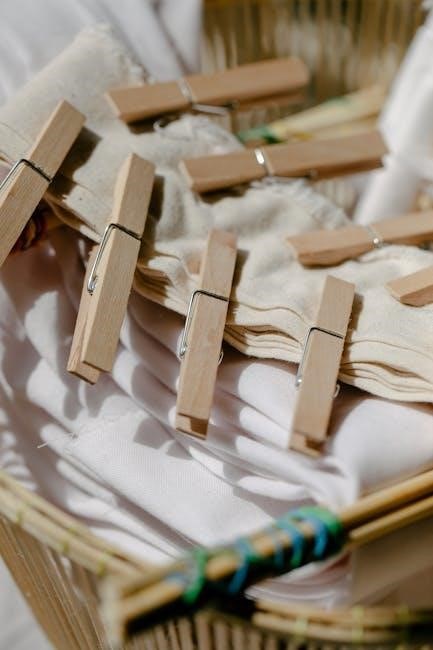
Gather rubber bands, a Tulip One-Step Tie-Dye Kit, gloves, buckets, and protective gear. Use natural fabrics like cotton and pre-wash them for best results. Soda ash is optional but recommended for vibrant colors.
2.1 Essential Items for Tie-Dye
To get started with tie-dye, you’ll need a few essential items. Rubber bands are crucial for creating folds and patterns on the fabric. A Tulip One-Step Tie-Dye Kit is highly recommended as it includes pre-mixed dyes, gloves, and instructions. Additional supplies include protective gloves, plastic buckets for soaking, and a pair of gloves to protect your hands from stains. Natural fabrics like cotton, linen, or rayon work best, as synthetic materials such as polyester or nylon may not absorb the dye properly. Pre-washing the fabric ensures no finishes interfere with the dye. Soda ash, a fixative, is optional but helps vibrant colors last longer. Procion dyes are another option for more complex projects. Measuring tools, a squeezer or spray bottle, and paper towels or a drop cloth are also handy for a neat workspace. Access to running water is necessary for rinsing. These items ensure a smooth and successful tie-dye experience.
2.2 Recommended Fabric Types
Natural fabrics are ideal for tie-dye, as they absorb dye effectively and produce vibrant results. Cotton is the most popular choice due to its soft texture and excellent dye absorption. Linen, another natural fiber, is also suitable and creates unique, earthy patterns. Rayon, a semi-synthetic fabric made from plant fibers, works well too, offering a silky texture with good dye uptake. Hemp fabric is durable and eco-friendly, making it a great option for sustainable tie-dye projects. Avoid synthetic fabrics like polyester or nylon, as they resist dye absorption and may not yield desired results. Blends with a high percentage of natural fibers can work, but the dye may appear less intense. Always choose breathable, untreated fabrics for the best outcomes. Pre-washing ensures no finishes interfere with the dye process, allowing colors to bind evenly to the material.
2.3 Dye and Chemical Requirements
For successful tie-dye, selecting the right dye and chemicals is essential. Fiber-reactive dyes, such as Procion MX, are highly recommended as they bond directly with fabric fibers, creating vibrant and long-lasting colors. Natural dyes, like indigo or turmeric, are eco-friendly alternatives but may require additional fixatives. Soda ash is a critical chemical that acts as a fixative, helping the dye bind to the fabric. It should be soaked into the fabric before dyeing to ensure optimal results. Always use high-quality dye powders and follow the instructions for proper mixing ratios. Natural dyes may need mordants, such as vinegar or plant extracts, to set the colors effectively. Avoid using cheap or generic dyes, as they may not yield consistent results. Properly measuring and mixing dye and chemicals ensures vibrant, even color distribution. Store all chemicals in a cool, dry place to maintain their effectiveness.

Preparation Steps
Wash fabric to remove finishes, fold into desired patterns, and protect workspaces with plastic or newspaper. Prepare rubber bands, gloves, and dyeing tools for efficient processing.
3.1 Washing and Preparing Fabric
Before starting the tie-dye process, it’s essential to wash the fabric thoroughly to remove any finishes or impurities that might interfere with dye absorption. Use warm water and a mild detergent, avoiding fabric softeners or bleach. Allow the fabric to dry slightly until it is damp but not soaking wet; This ensures optimal dye penetration. For best results, work with natural fabrics like cotton, linen, or rayon, as they absorb dye more effectively than synthetic materials. Remove any buttons or accessories to prevent them from obstructing the dyeing process. Once washed and prepared, the fabric is ready for folding and binding, which are critical steps in achieving unique tie-dye patterns.
3.2 Choosing the Right Folding Techniques
Folding is a critical step in tie-dye, as it determines the pattern and design of the final product. There are several folding techniques to choose from, each creating unique effects. The accordion fold involves folding the fabric into pleats, while the spiral fold creates a circular, swirly design. Knotted styles involve tying the fabric into small bunches for a speckled look. Another popular method is thescrunching technique, where the fabric is bunched randomly. The choice of fold depends on the desired pattern and the skill level of the person. For beginners, simpler folds like the accordion or scrunching are recommended. More intricate folds, such as the spiral, require patience and precision. Proper folding ensures that the dye penetrates evenly, resulting in vibrant and well-defined designs. Experimenting with different folds can lead to endless creative possibilities in tie-dye.
3.3 Setting Up the Workspace
Setting up a proper workspace is essential for a successful tie-dye experience. Start by covering your work surface with a drop cloth, plastic sheet, or old newspapers to protect it from dye stains. Lay out all necessary supplies, such as rubber bands, gloves, dye, and soda ash, within easy reach. Wear protective gear, including gloves and goggles, to avoid skin and eye irritation. Ensure good ventilation by opening windows or using a fan to prevent inhaling dye fumes. Organize the folded fabrics in a clean, dry area away from direct sunlight. Having a dedicated space helps maintain organization and minimizes accidents. A well-prepared workspace ensures the tie-dye process is efficient, enjoyable, and safe. Proper setup also reduces the risk of mistakes and makes cleanup easier after the project is complete.

The Tie-Dye Process
The tie-dye process involves folding fabric into unique patterns, applying dye, and allowing it to set. This creative technique results in vibrant, one-of-a-kind designs. Proper steps ensure success.
4.1 Mixing the Dye
Mixing the dye is a crucial step in the tie-dye process. Start by dissolving soda ash in warm water to create a fixative solution. This helps the dye bind to the fabric. Next, gradually add the dye powder to the mixture, stirring continuously to ensure even distribution. Use protective gloves and work in a well-ventilated area to avoid exposure. The ratio of dye to water varies depending on the intensity of the color desired. It’s important to follow specific instructions for the type of dye and fabric being used. Proper mixing ensures vibrant, long-lasting colors. Always test the dye on a small fabric sample before applying it to the final piece. This step requires attention to detail and careful preparation for optimal results.
4.2 Applying the Dye
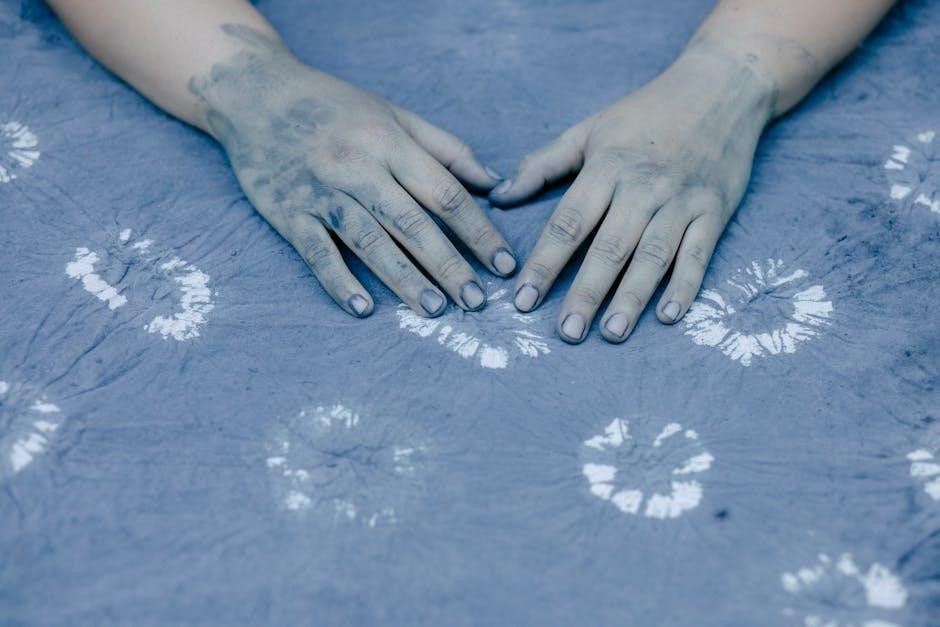
Once the dye is mixed, it’s time to apply it to the folded fabric. Put on gloves to protect your hands from staining. Use a squeeze bottle or pour the dye directly onto the fabric, focusing on the folded sections. Work methodically to ensure even coverage. For vibrant colors, apply the dye generously but avoid over-saturating the fabric, as this can lead to uneven results. To achieve unique patterns, experiment with layering different colors. Allow the dye to flow naturally into the folds, creating distinctive tie-dye effects. After applying, gently pat the fabric with a clean cloth to remove excess dye. Let the fabric sit undisturbed for the recommended time to allow the colors to set properly. Cover the fabric with plastic wrap to prevent drying out during this process.
4.3 Waiting for the Dye to Set
After applying the dye, the fabric must sit undisturbed to allow the colors to fully bind to the material. The waiting time typically ranges from 6 to 24 hours, depending on the type of dye and fabric used. It’s crucial to keep the fabric covered to maintain moisture and promote even color absorption. Cover the fabric with plastic wrap or a damp cloth to prevent drying out. Avoid moving or unfolding the fabric during this time, as it can disrupt the pattern and cause uneven color distribution. Patience is key, as rushing the process may result in faded or inconsistent colors. Once the waiting period is complete, carefully rinse the fabric under cold running water to remove excess dye before proceeding to the next step.
4.4 Rinsing and Washing
After the dye has set, gently rinse the fabric under cold running water to remove excess dye. Use your hands to carefully agitate the fabric, ensuring not to scrub or wring it, as this could distort the design. Once the water runs clear, wash the fabric in a washing machine using cold water and a mild detergent. To minimize color bleeding, wash the tie-dye separately from other clothes. For hand-washing, submerge the fabric in cold water with a small amount of detergent, swish gently, and rinse thoroughly. Avoid using hot water or harsh detergents, as they can cause the colors to fade. After washing, hang the fabric to air dry or tumble dry on a low setting. Proper rinsing and washing ensure vibrant, long-lasting colors and prevent dye from staining other items.
Post-Dyeing Care
Proper post-dyeing care ensures vibrant colors and fabric durability. Allow the dye to cure fully before washing, then wash inside out in cold water with mild detergent to preserve colors and prevent bleeding. Air-drying or tumble-drying on low helps maintain the design integrity. Avoid harsh detergents or hot water, as they can fade colors. Regular care extends the life of your tie-dye creation.
5.1 Allowing the Dye to Cure
Allowing the dye to cure is a critical step in ensuring the colors remain vibrant and long-lasting. After rinsing, the fabric needs time for the dye to fully bond with the fibers. Keep the garment folded or bundled as it was during the dyeing process and let it sit for 24 to 48 hours. This period allows the dye to set deeply into the fabric, making the colors more durable. It’s important to avoid direct sunlight during this time, as it can cause premature fading. Once cured, the fabric will be ready for washing. Proper curing ensures the design stays intact and the colors retain their intensity. For best results, follow the recommended curing time specified by the dye manufacturer.
5.2 Washing and Drying Instructions
Proper washing and drying are essential to preserve the vibrant colors and integrity of your tie-dye design. Begin by washing the fabric in cold water using a gentle detergent. Avoid using bleach or fabric softeners, as they can weaken the dye and cause fading. Turn the garment inside out before washing to protect the design from friction. For drying, air drying is recommended, as heat from dryers can cause colors to bleed or fade. If using a dryer, select a low-heat setting and remove the garment as soon as the cycle ends. Regular washing in cold water with mild detergents will help maintain the colors over time. Always wash tie-dye items separately from other clothes to prevent color transfer. Following these steps ensures your tie-dye creation remains vibrant and durable for years to come.
5.3 Tips for Longevity
To ensure your tie-dye design lasts for years, adopt a few simple care practices. Opt for high-quality, 100% natural fabrics like cotton, as they retain colors better than synthetic blends. Store tie-dye items in a cool, dry place away from direct sunlight, which can cause fading. Avoid using bleach or harsh detergents, as they can weaken the dye. Consider adding a color-protecting shampoo or vinegar to the wash cycle to lock in colors. When ironing, turn the garment inside out and use a low-heat setting to prevent damage. For added protection, apply a fabric sealant designed for dyed textiles. Regularly washing in cold water with mild detergent and avoiding fabric softeners will also help maintain vibrancy. By following these tips, you can enjoy your tie-dye creations for a long time while preserving their unique, artistic appeal.
Troubleshooting Common Issues
Common tie-dye issues include uneven color distribution, bleeding, and faded patterns. Ensure proper folding, use high-quality dyes, and follow washing instructions to minimize these problems effectively.
6.1 Fixing Uneven Color Distribution
Uneven color distribution in tie-dye can occur due to poor folding techniques, insufficient dye absorption, or inadequate soaking time. To fix this, ensure folds are tight and symmetrical, allowing dye to penetrate evenly. Use high-quality dyes mixed according to instructions and consider soaking fabric in soda ash before dyeing to enhance color absorption. If colors appear uneven after rinsing, re-dye specific areas or adjust folding patterns in future projects. Proper washing and drying techniques also prevent further unevenness. Always follow tie-dye instructions carefully to achieve desired results.
6.2 Addressing Color Bleeding
Color bleeding in tie-dye occurs when dyes migrate or run during washing, causing unwanted spreading of colors. To address this, use color-catching sheets like Shout ColorCatcher in the wash to absorb excess dye. Pre-washing fabric before dyeing and ensuring proper dye fixation can minimize bleeding. Applying a fixative, such as vinegar or commercial dye fixatives, after dyeing helps lock colors. Wash tie-dye items separately from other clothes, especially in the first few washes, using cold water and mild detergent. Avoid using fabric softeners, as they can break down dyes. For persistent bleeding, re-wash the item with a color-catching sheet until water runs clear. Ironing the fabric inside out can also help set the colors further. Following these steps ensures vibrant, long-lasting tie-dye results without excessive color bleeding.

Advanced Techniques
Explore multi-color layering, intricate folding patterns, and resistant methods like stenciling or discharge dyeing for unique designs. These techniques offer endless creative possibilities for experienced tie-dye artists.
7.1 Multi-Color Designs
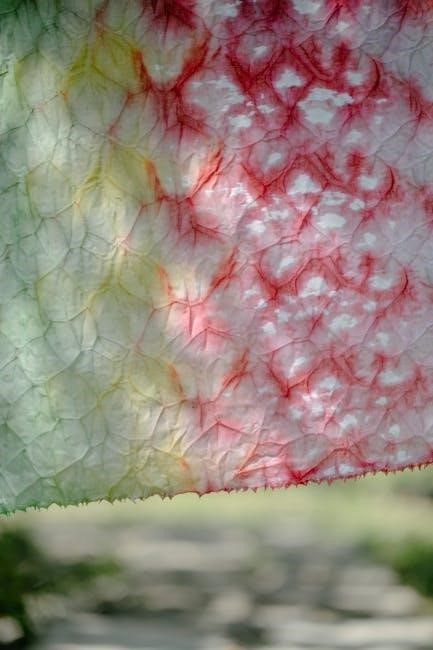
Creating multi-color designs in tie-dye involves layering different hues to achieve vibrant, intricate patterns. Start by folding the fabric into the desired shape, then apply the first color. Allow it to set before adding subsequent layers. Use squirt bottles for precision, ensuring each color is applied to specific sections. For bold contrasts, seal sections with rubber bands to prevent bleeding. Experiment with complementary colors for unique effects. To avoid muddying, wait for each dye layer to fully set before unfolding. This technique requires patience but yields stunning results. Practice on smaller projects to refine your skills. Multi-color tie-dye is perfect for creating eye-catching, one-of-a-kind designs that showcase your creativity.
7.2 Resistant Techniques
Resistant techniques in tie-dye involve creating areas where the dye cannot penetrate, resulting in unique, contrasting patterns. One common method is using rubber bands or stitches to tightly bind sections of fabric, preventing dye absorption. Another approach is applying wax or starch to specific areas before dyeing, as these substances repel dye. For intricate designs, combine folding and binding techniques with resist methods. Ensure the fabric is completely dry before applying resist materials to avoid unintended color spread. Experiment with layers of resist and dye for complex, multi-dimensional effects. These techniques allow for precise control over the final design, making them ideal for advanced tie-dye projects. Practice on scrap fabric to master the process before applying it to larger garments or textiles.

Safety Precautions
Always wear gloves, goggles, and a mask when handling dyes and chemicals. Work in a well-ventilated area, and keep the workspace clean and away from children or pets.
8.1 Protective Gear
Protective gear is essential when working with tie-dye to prevent skin and eye irritation. Always wear rubber or latex gloves to shield your hands from dye stains and harsh chemicals. Goggles or protective eyewear should be worn to safeguard your eyes from accidental splashes. A face mask is recommended to avoid inhaling dye powders or fumes. Additionally, wear an apron or old, protective clothing to prevent ruined clothes. Open-toe shoes should be avoided to protect feet from spills. Ensure all protective items are easily accessible before starting the dyeing process. Proper gear not only ensures safety but also enhances your overall tie-dye experience by reducing risks. Always prioritize safety to enjoy a fun and worry-free creative session. These precautions are vital for both beginners and experienced crafters alike.
8.2 Working in a Well-Ventilated Area
Working in a well-ventilated area is crucial when tie-dyeing to avoid inhaling dye fumes and chemical vapors. Open windows and doors to ensure good airflow, which helps dissipate any strong smells. Avoid working in small, enclosed spaces without proper ventilation, as this can lead to respiratory discomfort. If possible, set up your workspace near a window or use a fan to circulate air. This precaution is especially important when mixing dye powders, as they can release fine particles into the air. Proper ventilation not only enhances safety but also makes the process more enjoyable. Never work in basements, bathrooms, or areas with poor airflow without ensuring adequate ventilation first. By maintaining a well-ventilated workspace, you protect your health and create a safer environment for crafting. Always prioritize airflow to minimize risks associated with tie-dyeing chemicals.

Creative Ideas
Explore unique folding techniques, layer dyes for vibrant multi-color effects, or incorporate natural materials like leaves for textured patterns. Experiment with asymmetrical designs or mix tie-dye with embroidery for personalized flair.
9.1 Unique Folding Patterns
Unique folding patterns are a cornerstone of tie-dye artistry, allowing for intricate and personalized designs. One popular technique is the “accordion pleat,” where fabric is folded into thin, even layers and bound tightly to create striped effects. The “spiral fold” involves twisting fabric into a circular shape, resulting in a vibrant, swirling design. Another innovative method is the “origami fold,” where fabric is folded into geometric shapes like triangles or squares, producing sharp, angular patterns. For a more organic look, try the “crumple fold,” where fabric is bunched into a loose ball and secured with rubber bands. Experimenting with these folds can yield stunning, one-of-a-kind results. Don’t forget to tighten bindings to ensure crisp, well-defined patterns. With practice, you can master these folds and create truly unique tie-dye pieces!
9.2 Combining Tie-Dye with Other Crafts
Combining tie-dye with other crafts opens up endless creative possibilities. One popular approach is incorporating embroidery or appliqué into tie-dye designs, adding intricate stitching or decorative elements to enhance patterns. Another idea is pairing tie-dye with quilting, creating vibrant, multi-colored fabric patches for unique quilts. Batik, a resist-dyeing technique, can also be blended with tie-dye for textured, layered effects. For upcycling projects, tie-dye can revive old clothing by adding fresh, bold colors. Additionally, tie-dye fabrics can be used in macrame or knitting projects, infusing ropes or yarns with dynamic hues. Experimenting with these combinations allows crafters to push boundaries and create one-of-a-kind pieces. Whether it’s mixing media or techniques, tie-dye’s versatility makes it an excellent addition to various crafting endeavors, inspiring innovation and artistic expression.
Tie-dye is a vibrant and expressive craft that offers endless possibilities for creativity. With the right materials, techniques, and care, anyone can achieve stunning, one-of-a-kind designs. From classic folds to advanced multi-color patterns, tie-dye allows individuals to experiment and bring their unique vision to life. Proper preparation, careful dye application, and patience are key to achieving professional-looking results. Whether you’re creating clothing, home decor, or gifts, tie-dye adds a personal touch that makes each piece truly special. By following the steps outlined in this guide and embracing experimentation, you can unlock the full potential of tie-dye. Remember, the beauty of this craft lies in its unpredictability, so don’t be afraid to try new things and enjoy the creative journey. With practice, you’ll master the art of tie-dye and produce lasting, eye-catching designs.