Understanding Electric Fence Components
An electric fence system includes essential components like the energizer, wires, insulators, and grounding rods. These parts work together to create a safe and effective barrier.
1.1. Fence Controller (Energizer)
The fence controller, or energizer, is the heart of the electric fence system. It converts low-voltage power into high-voltage pulses, creating an effective deterrent. Typically powered by a battery or mains electricity, the energizer stores energy and releases it in regulated bursts. Modern units often include features like voltage indicators, fault detection, and adjustable settings. Proper installation and grounding are crucial for optimal performance. The energizer’s output voltage should match the fence’s requirements to ensure safety and efficiency. Always refer to the wiring diagram to connect the energizer correctly, as incorrect connections can damage the system or pose safety risks.
1.2. Wiring and Connections
Proper wiring and connections are critical for the safe and efficient operation of an electric fence. The system typically includes a live wire, ground wire, and sometimes multiple wires for zone control. High-quality insulated wire is recommended to minimize energy loss. Insulators are essential to prevent the wire from coming into contact with posts, which could cause short circuits. Connections should be secure and weatherproof to ensure consistent voltage delivery. Always follow the wiring diagram to connect the energizer, ground rods, and fence wires correctly. Regular checks are necessary to identify and repair any faulty connections or voltage drops.
1.3. Grounding System
A proper grounding system is essential for the safe and effective operation of an electric fence. It ensures that electricity flows through the system as intended and provides a path for the current to return to the energizer. Grounding rods, typically made of copper or galvanized steel, are driven into the earth near the energizer. Multiple rods may be required for larger systems to ensure adequate conductivity. The ground wire connects these rods to the energizer, completing the circuit. A well-maintained grounding system prevents voltage drops and ensures the fence functions reliably. Regular inspection of ground connections is crucial to avoid system failures.
Installation Guide for Electric Fence Wiring
Proper installation ensures your electric fence functions safely and effectively. Plan the layout, gather tools, and follow a step-by-step process to securely connect wires and components.
2.1. Planning the Fence Layout
Planning the fence layout is crucial for ensuring effectiveness and safety. Measure the perimeter to determine the length of wire needed. Consider the number of wires, spacing between posts, and placement of insulators. Identify the location for the energizer and grounding system. Ensure the layout avoids obstacles and interference from power lines. Proper planning ensures even voltage distribution and prevents short circuits. Consult a wiring diagram to visualize the setup and make adjustments as needed. This step guarantees a secure and functional electric fence system.
2.2. Tools and Materials Needed
To install an electric fence, you’ll need specific tools and materials. Essential items include high-tensile or insulated wire, posts, insulators, and an energizer. Grounding materials like rods and wire are crucial for safety. Tools such as a wire stretcher, drill, and voltage tester are necessary for proper installation. Insulated gloves and safety gear protect against electric shocks. Ensure all components are durable and suitable for outdoor conditions. A wiring diagram will guide you in selecting the right materials. Gathering everything beforehand ensures a smooth and efficient installation process. Quality materials guarantee a safe and effective electric fence system.
2.3. Step-by-Step Installation Process
Begin by planning the layout and marking the fence perimeter. Install posts at intervals, ensuring stability. Next, attach insulators to the posts to hold the wire securely. Run the wire through the insulators, keeping it taut. Connect the energizer to the wire and ground rod. Bury the ground rod 6-8 feet deep and attach the ground wire. Test the system using a voltage tester to ensure proper current flow. Double-check connections and tighten any loose wires. Finally, inspect the fence for any damage or weak points. Always follow the wiring diagram for precise connections.

Troubleshooting Electric Fence Issues
Common problems include broken wires, poor grounding, and voltage drops. Check for loose connections and test voltage levels using a tester. Ensure the grounding system is functioning correctly.
3.1. Common Problems and Solutions
Common issues with electric fences include broken wires, poor grounding, and voltage drops. To diagnose, use a voltage tester to check for power at various points. Broken wires can be identified by low voltage or no shock. Inspect wires for damage or wear. For grounding problems, ensure the ground rod is properly connected and buried. Voltage drops may require additional grounding rods or shorter fence sections. Regularly inspect insulators and connections to prevent issues. Always refer to the wiring diagram for troubleshooting guidance.
3.2. Checking Voltage Drops
Voltage drops in an electric fence can reduce its effectiveness. To check for voltage drops, use a digital voltage tester at various points along the fence. Start by testing near the energizer to ensure it’s outputting the correct voltage. Then, test at intervals, especially after corners or long runs of wire. If voltage drops below 2,000 volts, inspect for loose connections or corrosion. Poor grounding or excessive wire lengths are common causes. Consider adding grounding rods or shorter fence sections to maintain optimal voltage levels. Regular testing helps ensure the fence remains secure and functional.
Safety Tips for Handling Electric Fences
Always turn off the power before handling wires. Wear insulated gloves to prevent shocks. Avoid touching metal objects while working. Keep children and pets away.
4.1. Precautions During Installation
When installing an electric fence, always de-energize the system before handling wires. Wear insulated gloves and avoid contact with metal objects. Ensure the fence is not live during installation. Check for underground cables or phone lines near the fence line to prevent interference. Properly ground the system to avoid electric shocks. Keep bystanders, children, and pets at a safe distance. Use a voltage tester to confirm the fence is off before starting work. Follow the manufacturer’s instructions for safe installation practices to minimize risks and ensure the system operates effectively. Safety should always be the top priority.
4.2. Best Practices for Maintenance
Regularly inspect the electric fence wiring and components to ensure optimal performance. Check for worn or damaged wires, and replace them promptly. Clean insulators and posts to prevent voltage drops caused by dirt or debris. Test the fence voltage monthly using a reliable tester to ensure it’s within the recommended range. Maintain proper grounding by checking the earth spike and ensuring it’s securely connected. Trim vegetation near the fence to avoid short circuits. Keep detailed records of maintenance activities to track system health. Address any issues quickly to prevent failures and ensure the fence remains an effective barrier. Consistent upkeep is crucial for long-term functionality and safety.

How to Read an Electric Fence Wiring Diagram
Understanding the symbols and connections in an electric fence wiring diagram is crucial for proper installation. The diagram illustrates the energizer, wires, and grounding system.
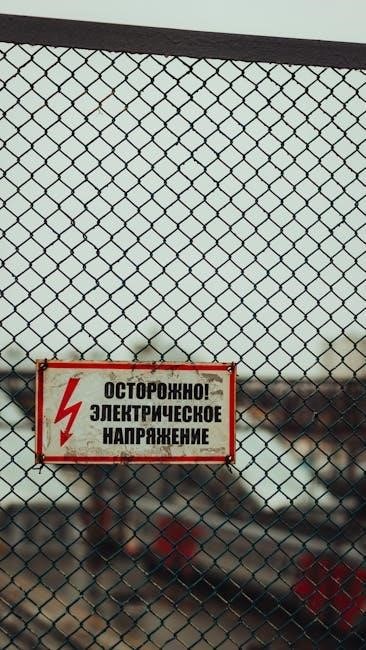
5.1. Understanding Symbols and Notations
Electric fence wiring diagrams use specific symbols to represent components. The energizer is often shown as a rectangle with terminals, while wires are depicted as lines connecting components. Grounding rods are usually marked with a ‘G’ or an earth symbol. Insulators are indicated by small circles or notations, ensuring wires are properly insulated. Voltage indicators and connectors may also be labeled. Familiarizing yourself with these symbols is essential for accurately interpreting the diagram and ensuring correct installation. Proper understanding prevents errors and ensures the fence operates safely and effectively. Always refer to the legend provided for clarity.
5.2. Importance of Diagrams for Installation
Electric fence wiring diagrams are crucial for a successful installation. They provide a clear visual guide, ensuring all components are correctly connected. A diagram helps identify the proper layout of wires, insulators, and grounding systems. It prevents installation errors, which could lead to safety hazards or system inefficiency. By following the diagram, you can ensure the fence operates effectively and safely. Diagrams also aid in troubleshooting, allowing you to quickly locate and resolve issues. For anyone new to electric fencing, a wiring diagram is an essential tool, simplifying the process and ensuring a professional result. Always refer to the diagram for precise instructions.
Advanced Electric Fence Configurations
Advanced configurations involve multiple wire systems and portable options, enhancing security and versatility. These setups are ideal for complex layouts or temporary fencing needs.
6.1. Multiple Wire Systems
Multiple wire systems enhance security by using several live wires at varying heights. This configuration deters animals and intruders effectively. Proper spacing between wires ensures optimal performance.
6.2. Portable and Temporary Fencing Options
Portable and temporary electric fencing options offer flexibility for various needs, such as rotational grazing or short-term animal containment. These systems are easy to install and require minimal tools, making them ideal for quick setups. Temporary fencing often uses lightweight materials like polywire or tape, which are easy to move and reuse. Portable systems can be powered by batteries, ensuring convenience in remote areas. They are cost-effective and versatile, adapting to different terrains and purposes without permanent infrastructure. This solution is perfect for farmers or landowners needing temporary barriers.
