
Discover how to create stunning planter boxes with our detailed Blueprint Planter Box Plans PDF. This guide offers step-by-step instructions‚ diagrams‚ and practical tips for gardeners of all skill levels. Perfect for DIY enthusiasts‚ it covers everything from simple designs to complex layouts‚ ensuring your project turns out perfectly every time.
Overview of Planter Box Plans
Planter box plans offer a variety of designs‚ from simple rectangular boxes to intricate curved layouts. They typically include lists of materials‚ tools‚ and step-by-step instructions. Many plans are customizable‚ allowing you to adjust sizes or add features like drainage systems. Perfect for DIY enthusiasts‚ these plans cater to all skill levels‚ ensuring a successful and rewarding project.
Importance of Using a Blueprint
Using a blueprint ensures accuracy and professional results for your planter box project. It provides clear instructions‚ precise measurements‚ and detailed diagrams‚ helping you avoid costly mistakes. A blueprint streamlines the building process‚ saving time and effort. Whether you’re a novice or experienced DIYer‚ a well-designed blueprint guarantees a sturdy and visually appealing planter box tailored to your needs.
Benefits of PDF Format for Plans
The PDF format offers unmatched convenience and clarity for planter box plans. It ensures high-quality visuals‚ precise measurements‚ and easy accessibility across devices. PDFs are scalable without losing detail‚ making them ideal for printing or digital use. They also provide a professional layout‚ enhancing your DIY experience with organized and visually appealing instructions for your project.
Materials and Tools Required
Essential materials include lumber (2x4s‚ 2x6s)‚ screws‚ nails‚ and weather-resistant wood. Tools needed are a circular saw‚ drill‚ measuring tape‚ and sandpaper for smooth assembly and finishing.
Lumber and Wood Selection
Choose durable‚ weather-resistant lumber like cedar or redwood for outdoor planter boxes. Opt for straight‚ knot-free boards to ensure stability and a professional finish. Common sizes include 2x4s and 2x6s‚ which offer the perfect balance of strength and affordability. Proper wood selection ensures longevity and protects your planter from environmental elements‚ making it last for years with minimal maintenance.
Fasteners and Hardware
Selecting the right fasteners is crucial for durability and stability. Use weather-resistant screws‚ nails‚ or bolts to secure the lumber‚ ensuring they are galvanized or stainless steel to withstand outdoor conditions. Wood glue can reinforce joints for added strength. Optional hardware includes hinges for lids or brackets for wall mounting. Proper fastening ensures your planter box remains sturdy and weather-resistant over time.
Finishing Materials
Protect and enhance your planter box with durable finishes. Apply weather-resistant sealants‚ stains‚ or paints to shield the wood from moisture and UV damage. Consider using oil-based stains for longevity or water-based options for easier cleanup. Optional decorative elements like metal accents or trim can add a personalized touch. Proper finishing ensures your planter box remains attractive and functional for years to come.
Understanding the Blueprint
Mastering the blueprint ensures accuracy in your planter box project. It provides clear layouts‚ dimensions‚ and assembly instructions‚ helping you visualize and execute the design flawlessly every time.
How to Read the Plan
Start by identifying the symbols and labels on the blueprint. Locate the diagrams‚ cutting lists‚ and measurements. Understand the scale and how each part of the plan corresponds to the actual project. Pay attention to annotations for assembly instructions. Familiarize yourself with the layout to ensure all components fit together correctly. This will help you avoid errors and achieve a professional finish for your planter box.
Key Measurements and Dimensions
Ensure accuracy by reviewing the lumber sizes‚ cutting lengths‚ and assembly dimensions in the plan. Double-check the width‚ height‚ and depth to fit your space. Verify the thickness of materials and spacing for proper alignment. These details are crucial for a sturdy and visually appealing planter box that meets your design goals and functional needs.
Scaling the Design
Easily modify the planter box size to fit your space by adjusting the blueprint measurements. Scale the width‚ height‚ or length while maintaining proportions for a balanced look. Use the provided diagrams to visualize changes and ensure all cuts align properly. This flexibility allows you to customize the design without compromising structural integrity or aesthetic appeal.
Safety Tips and Precautions
Always wear safety glasses and gloves when cutting or assembling wood. Ensure proper ventilation when using power tools and avoid loose clothing that could get caught. Keep sharp objects away from children and maintain a clean workspace to prevent accidents.
Personal Protective Equipment
Wear safety glasses to protect your eyes from debris and dust. Use sturdy gloves to prevent cuts and splinters. A dust mask is essential when sanding wood. Steel-toe boots can safeguard your feet from heavy tools or falling objects. Tie back long hair and avoid loose clothing that might get caught in machinery for a safer woodworking experience.
Safe Cutting and Assembly Practices
Always use sharp blades to prevent kickbacks and maintain control. Ensure your workbench is clear of clutter to avoid accidents. Clamp wood firmly before cutting to keep it stable. Wear safety glasses and gloves during power tool use. Double-check measurements before making cuts. Use proper lifting techniques to handle heavy materials‚ and never reach over moving blades for safety.

Step-by-Step Assembly Guide
Follow the blueprint to cut wood accurately and begin assembly. Start by building the frame‚ then attach sides and bottom securely. Use weather-resistant screws for durability and ensure the box is square before adding the top. Double-check all joints for sturdiness to create a dependable planter box for your garden.
Cutting the Wood Accurately
Cutting wood accurately is crucial for a professional finish. Use a circular or miter saw for smooth cuts. Measure and mark each piece carefully‚ following the cutting list in your blueprint. Clamp the wood firmly to prevent movement during cutting. Double-check measurements before making each cut to ensure precise fits and avoid waste. This step ensures your planter box assembly will be seamless and sturdy.
Assembling the Box
Assemble the planter box by aligning the sides and bottom according to your blueprint. Use screws or nails to secure the pieces‚ ensuring corners are square and edges are flush. Place the bottom panel inside the frame‚ then attach the sides carefully. Clamp each piece before fastening to maintain alignment and avoid gaps. Double-check the fit before finalizing the assembly for a sturdy and even structure.
Securing the Bottom and Sides
Attach the bottom panel to the sides using weather-resistant screws or nails‚ ensuring a snug fit. Align edges carefully and clamp pieces to prevent movement during fastening. Drill pilot holes to avoid splitting the wood. For added stability‚ use wood glue along the joints before securing. Double-check the alignment and tighten all fasteners firmly to ensure a sturdy and leak-proof planter box.
Customization and Design Options
Personalize your planter box with decorative features like trim‚ paint‚ or stains. Modify sizes and shapes to fit your space and style‚ enhancing both functionality and aesthetics.
Adding Decorative Features
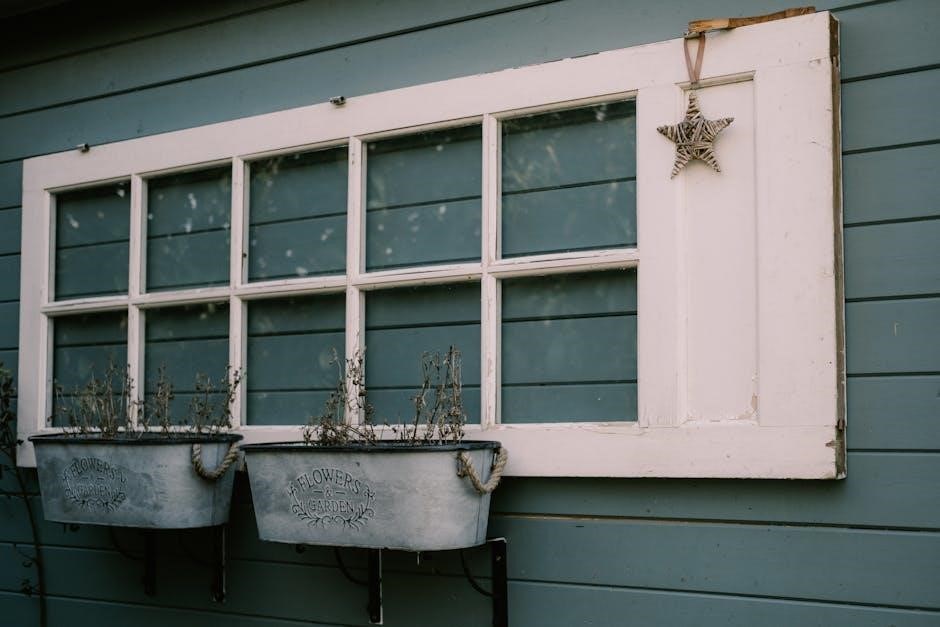
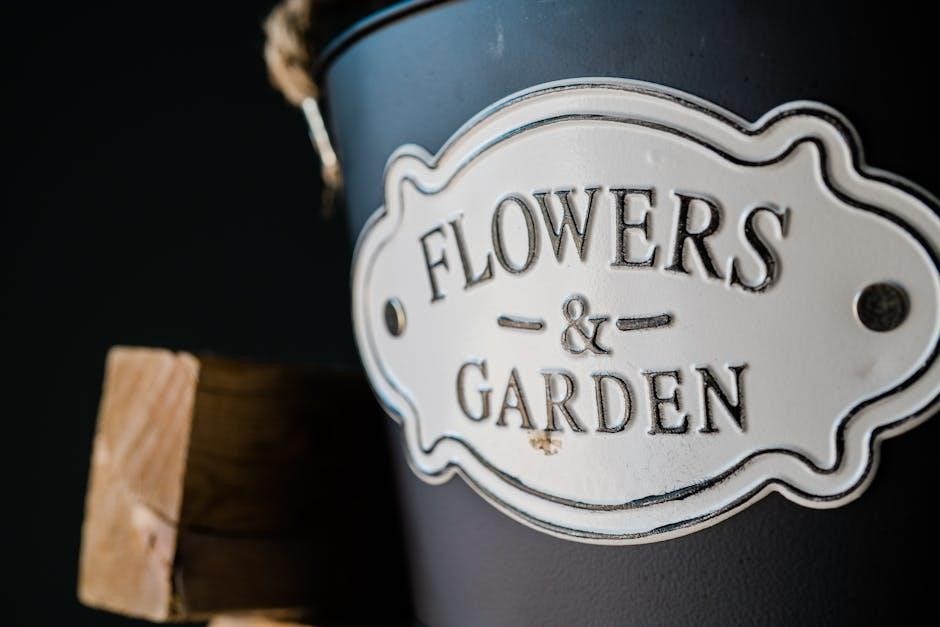
Elevate your planter box with decorative elements like carved wood trim‚ ornate metal accents‚ or vibrant paint. Consider adding lattice panels or ornamental brackets for a unique touch. These features not only enhance visual appeal but also allow for personal expression‚ making your planter box a standout piece in any garden or outdoor space.
Finishing Techniques
Enhance your planter box with a variety of finishing techniques. Apply a stain or sealant to protect the wood and maintain its natural beauty. For a personalized look‚ consider painting or adding a protective finish. These methods ensure durability and weather resistance while allowing you to customize the appearance of your planter box to match your outdoor decor.
Optional Drainage Systems
Implementing a drainage system is crucial for healthy plant growth. Add drainage holes at the bottom of your planter box to prevent waterlogging. For enhanced functionality‚ consider incorporating a layer of gravel or mesh to improve water flow and root health.
Optional drainage systems can be customized to suit your design. Proper drainage ensures soil remains aerated‚ preventing root rot and promoting healthy plant development. This step is essential for maintaining the longevity and functionality of your planter box.

Maintenance and Care
Regular cleaning and sealing protect the wood‚ ensuring durability. Inspect for damage and apply finishes as needed.
Water plants appropriately and fertilize seasonally to maintain health and vibrant growth.
Protecting the Wood
Use durable woods like cedar or redwood for natural resistance to rot and pests. Apply waterproof sealants or oils annually to maintain integrity. Regularly clean surfaces and inspect for damage. Avoid harsh chemicals that could harm plants or degrade the wood. Proper protection ensures your planter box remains sturdy and attractive for years‚ supporting healthy plant growth.
Caring for Plants
Ensure your plants thrive by using high-quality soil and maintaining proper drainage. Place plants in a spot with adequate sunlight based on their needs. Water plants regularly‚ avoiding over-saturation to prevent root rot. Fertilize seasonally to promote healthy growth. Monitor for pests and diseases‚ addressing issues promptly. With proper care‚ your planter box will become a vibrant‚ long-lasting garden feature.

Budget and Cost Considerations
Plan your project with a budget in mind. Estimate material costs‚ tool expenses‚ and labor if applicable. Reclaimed or leftover lumber can help reduce costs. Choose materials wisely to stay within your budget while ensuring durability and quality for your planter box. Adjust the design size or complexity to suit your financial plan.
Estimating Material Costs
Accurately estimate material costs by listing all required components‚ such as lumber‚ fasteners‚ and finishing products. Compare prices at local hardware stores or online retailers. Consider the quantity and quality of materials to ensure durability. Plan ahead to avoid overspending and allocate your budget wisely. Use the provided shopping list in the PDF plans for precise calculations and cost management.
Tools and Equipment Costs
While planter box plans are cost-effective‚ essential tools like a circular saw‚ drill‚ and measuring tape are necessary. Sandpaper and a level may also be needed. Optional tools‚ such as a router for decorative edges‚ can enhance your project. Budget-friendly options exist‚ so consider basic tools for small projects or invest in higher-quality equipment for long-term use and multiple builds.
Saving Money on Materials
Building a planter box doesn’t have to be expensive. Use leftover lumber from previous projects to reduce costs. Opt for durable‚ weather-resistant woods like cedar or redwood‚ which last longer and require less maintenance. Consider shopping during sales or using reclaimed wood for a budget-friendly option. Downloading free PDF plans also helps you save on design costs while ensuring a professional finish.

Troubleshooting Common Issues
Address gaps and misalignments by double-checking measurements. Fix warped wood by allowing it to dry or using clamps. Ensure proper assembly to avoid structural issues.
Addressing Gaps and Misalignments
Ensure precise cuts using a miter or circular saw with a guide and check with a square. Clamp pieces during assembly to prevent shifting. Inspect wood for warping and adjust assembly accordingly. Verify blueprint measurements and adjust if necessary. Use appropriate hardware and consider wood glue for tighter joints. Work in a stable environment to minimize wood movement due to humidity.
Fixing Warped or Twisted Wood
Identify warped wood early by checking for uneven surfaces or twisting. Clamp pieces firmly during assembly to realign them temporarily. Use a hand plane or sander to smooth uneven areas. Ensure wood is properly dried before use to prevent further warping. If severely twisted‚ consider replacing the piece. Always pre-drill holes to avoid splitting and maintain structural integrity during assembly.
With these detailed Blueprint Planter Box Plans PDF‚ you’re ready to create beautiful‚ functional planters. Start building today and enjoy your new gardening space!
Final Tips for Success
- Follow the blueprint closely to ensure accuracy and avoid mistakes.
- Measure twice and cut once to maintain precision.
- Use high-quality materials for durability and a professional finish.
- Don’t rush—take your time to enjoy the process.
- Consider adding drainage holes for healthy plant growth.
- Seal the wood to protect it from weather conditions.
- Add a finish or paint for a personalized touch.
- Maintain your planter box regularly for longevity.
Encouragement to Start Building
Building your planter box is a rewarding DIY project that combines creativity with practicality. Start by gathering materials and tools‚ then follow the blueprint step-by-step. Don’t be afraid to experiment with designs or finishes. Even if you’re a beginner‚ the process is straightforward and enjoyable. Take pride in creating something that enhances your outdoor or indoor space. Happy building!